Temperature-sensitive freight rarely fails in dramatic ways. It fails quietly: a box waits on a warm dock for three extra hours, the coolant runs out somewhere in the last fifty miles, or a missing mark holds a package in a sort facility until the contents are no longer sellable. Almost every one of those failures is decided before the box is sealed.
This guide is a complete reference for shipping perishable and temperature-sensitive goods by parcel. It covers how to define the temperature you need, how heat gets into a box and how to stop it, how to choose and size insulation and coolant, the rules for dry ice, how to test and monitor a pack-out, what it really costs, and what to do when something goes wrong. Use the contents list to jump to the part you need.
Regulations, carrier rules and service options change. Treat this guide as a framework, and confirm current requirements with your carrier, your packaging supplier and the relevant food-safety authority before you ship.
Key terms
- Pack-out: the complete configuration of a shipment, meaning the box, insulation, coolant, product and any fill, assembled in a set order.
- Coolant (or refrigerant): anything that absorbs heat inside the box, such as dry ice, gel packs or phase change materials.
- Conditioning: preparing coolant, and sometimes insulation, to the right starting temperature before packing.
- Excursion: any period where the product goes outside its allowed temperature range.
- Transit time: the time from carrier pickup to delivery. Design for the slowest realistic transit time, not the advertised one.
- Dimensional (DIM) weight: a billing weight calculated from the box's size. Carriers charge the greater of actual and dimensional weight.
Step one: define the temperature range
The single most important decision is the temperature range the product must stay within from the moment it leaves your hands until it is in the customer's refrigerator or freezer. Everything else, from insulation to coolant to the carrier service, follows from it.
Two reference points from US food-safety guidance are useful anchors. Refrigerated food should be kept at 40°F (4°C) or below, and frozen food at 0°F (−18°C) or below. Between 40°F and 140°F (4–60°C) is the range where bacteria multiply most rapidly, often called the danger zone. Your product may have tighter limits than these, so set the range from your product's own requirements.
| Product group | Typical target | Usual coolant | Examples |
|---|---|---|---|
| Frozen | Stays frozen solid, 0°F (−18°C) or colder | Dry ice | Ice cream, frozen meals, frozen seafood and meat |
| Chilled | Cold but not frozen, at or below 40°F (4°C) | Gel packs or chilled phase change materials | Fresh meat and fish, dairy, fresh produce, prepared foods |
| Controlled ambient | Protected from heat (and sometimes freezing) | Insulation, with light coolant in hot months | Chocolate, some baked goods, certain supplements |
Write the range down as an actual number with an upper and a lower limit, and get agreement from whoever owns product quality. A clear target turns packaging from guesswork into an engineering problem that can be tested.
A common and costly mistake is shipping chilled products with dry ice. At −109.3°F (−78.5°C), dry ice will freeze anything it touches, ruining fresh produce, cheese, eggs and many sauces.
How heat gets into a box
A shipping box is not a refrigerator. It cannot make cold; it can only slow down how quickly outside heat reaches the product. Heat arrives in three ways, and a good pack-out deals with each.
- Conduction through the walls. Heat travels through the box material from the warm outside to the cold inside. Better insulation slows it down, which is why liner quality matters more than almost anything else.
- Convection from air inside the box. Empty space holds air that warms and circulates around the product. A liner sized closely to the contents, with gaps filled, reduces this a great deal.
- Radiation from the sun and hot surfaces. Packages left in direct sun, or on hot truck floors and tarmac, absorb radiant heat. Reflective liners and handling instructions help.
Coolant absorbs the heat that does get in. The better the insulation, the less coolant you need, which keeps weight and cost down. That is why improving insulation is often a better investment than adding more ice.
Choosing insulation
There are four broad families of insulated packaging. The right one depends on the product's value, the transit time and how much your customers care about recyclability.
| Insulation | Performance | Cost | Trade-offs |
|---|---|---|---|
| Expanded polystyrene (EPS) cooler | Good | Low | Rigid and effective, but bulky to store and not accepted for recycling everywhere |
| Polyurethane foam | Very good | Medium | Thinner walls for the same protection, so more product fits in a smaller box |
| Vacuum-insulated panels | Excellent | High | Best performance in the thinnest wall; usually reserved for high-value or long-duration shipments |
| Fibre-based liners (paper, cotton, plant fibre) | Moderate to good | Low to medium | Often curbside recyclable or compostable; test carefully on long or hot routes |
Whatever you choose, size the liner to the product. A cooler twice as large as needed is not twice as safe: it holds more warm air, needs more coolant, and costs more in dimensional weight.
Choosing coolant
Coolant is chosen by the temperature it holds, not by how cold it feels. Each type has a characteristic temperature it sits at while it absorbs heat.
| Coolant | Holds around | Best for | Watch out for |
|---|---|---|---|
| Dry ice (solid CO₂) | −109.3°F (−78.5°C) | Keeping frozen products frozen | Regulated as hazardous for air; freezes chilled products; gas must be able to escape |
| Water-based gel packs | About 32°F (0°C) while thawing | Chilled products | Must be fully frozen first; can freeze products they touch directly |
| Phase change materials (PCMs) | Engineered for a set temperature | Tight ranges, such as 35–46°F (2–8°C) | Higher cost; need careful conditioning |
| Wet ice | About 32°F (0°C) | Rarely suitable for parcels | Melts into liquid that can leak and damage packaging; many carriers restrict it |
Dry ice: the rules
Dry ice is solid carbon dioxide. Instead of melting, it turns straight into carbon dioxide gas, a process called sublimation. That makes it excellent for keeping frozen goods frozen, and it is also why dry ice is regulated.
For air transport, dry ice is classified as a dangerous good: UN 1845, Class 9 (miscellaneous). Even shipments booked as ground can travel by air for part of their journey, and every carrier applies its own rules. The core requirements usually include the following.
- Packaging must let the gas escape. Never seal dry ice in an airtight container; pressure can build until it ruptures.
- The outer package must be marked 'Dry Ice' or 'Carbon dioxide, solid', with the UN number (UN 1845) and the net weight of dry ice in kilograms.
- Air shipments generally need a Class 9 hazard label, plus the shipper's and recipient's names and addresses.
- The dry ice must be declared to the carrier, usually through your shipping system or on the air waybill. When dry ice is only used to keep non-hazardous goods cold, a full dangerous-goods declaration is often not needed, but the declaration to the carrier still is.
- Carriers limit how much dry ice a single package may contain, and some services or destinations do not accept it at all.
Staff who prepare dry ice shipments need appropriate training, and you should keep a record of it. Carriers can refuse, return or delay non-compliant packages, and fines can apply.
Carrier limits and labelling details differ and change. Before your first dry ice shipment, read your carrier's current dry ice guidance for the exact service you plan to use.
Dry ice: handling it safely
- Wear insulated gloves. Direct contact with dry ice causes frostbite-like burns within seconds.
- Work in a well-ventilated area. Carbon dioxide gas displaces oxygen and can build up in small, closed spaces such as walk-in freezers, storage rooms and vehicle cabins.
- Never store dry ice in an airtight container, a sealed cooler, or a domestic freezer, where pressure can build or thermostats can fail.
- Do not transport significant quantities in a closed car. If you must, ventilate the vehicle.
- Keep it away from people who have not been trained, and label storage areas clearly.
Sizing the coolant
Coolant has to outlast the slowest realistic transit time, not the advertised one. A package promised for next-day delivery can still sit an extra day if it misses a connection or arrives when no one is home. Plan for at least one plausible delay.
Dry ice disappears as it sublimates. A commonly cited rule of thumb is roughly 5 to 10 pounds lost every 24 hours in a typical shipping cooler, but the real rate depends heavily on the insulation, the amount of product and the outside temperature. Gel packs, likewise, stop protecting once they have fully thawed. Use these steps to arrive at a starting point, then confirm it by testing.
- Set the design transit time: the advertised time plus one realistic delay, such as a missed connection.
- Get your packaging supplier's performance data for the liner and coolant at the outside temperatures you expect.
- Choose a starting coolant quantity that covers the design transit time with a safety margin.
- Run test shipments with a temperature logger, in both warm and cold weather.
- Adjust up or down based on the results, then lock the quantity into your documented pack-out.
Building the pack-out
The order in which you build the box matters as much as what goes into it. Below are starting configurations for the three product groups. Adjust them to your test results.
Frozen pack-out (dry ice)
- Pre-chill the product so it goes into the box fully frozen.
- Place the product inside the insulated liner, keeping it as compact as possible.
- Place dry ice on top of the product, because cold air sinks. For long routes, add some along the sides too.
- Fill empty space so the product cannot move and air cannot circulate.
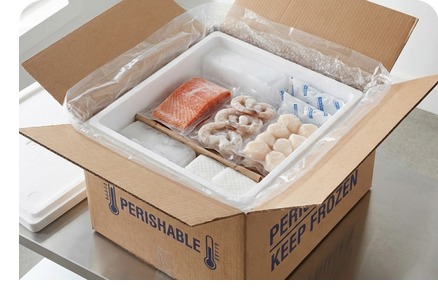
- Close the liner without making it airtight, then close and tape the outer carton.
- Apply the dry ice markings and labels before handing over.
Chilled pack-out (gel packs)
- Fully condition the gel packs for the full time your supplier recommends. Partly frozen packs run out early.
- Pre-chill the product, so the coolant is not spent cooling warm food.
- Place a layer of gel packs in the bottom of the liner, then a thin barrier such as corrugated card.
- Add the product and fill empty space.
- Add another barrier, then a layer of gel packs across the top, where heat usually arrives first.
- Close the liner fully, then seal the outer carton.
Controlled-ambient pack-out
- Use an insulated liner sized to the product.
- In warm months, add a small amount of conditioned coolant, separated from the product by a barrier.
- Avoid dark packaging that absorbs sunlight, and mark the box to keep it out of direct sun if the carrier supports it.
Planning for the seasons
A pack-out that works in mild weather can fail in a heatwave, and an over-built summer pack-out wastes money in winter. Rather than reacting to complaints, plan seasonal configurations and switch on a schedule.
| Season | Adjustment | Why |
|---|---|---|
| Cool months | Lighter insulation or less coolant | Saves weight, cost and packing time |
| Warm months | More coolant, thicker insulation, faster service on long routes | Higher outside temperatures drain coolant faster |
| Heatwaves | Pause shipments to the hottest regions or ship only early in the week | Even a strong pack-out can fail in extreme heat |
| Very cold spells (chilled goods) | Add insulation to stop products freezing | Chilled products can freeze in transit in severe cold |
Choosing the carrier service and ship days
Choose the slowest service that still arrives comfortably inside the window your pack-out can hold. Faster services cost more; slower ones risk spoilage. The right answer often changes by destination.
The calendar is one of the cheapest tools you have, because most spoilage happens when a package sits somewhere it was not meant to be.
- Ship early in the week, so a single delay does not leave a package in a facility over the weekend.
- Avoid shipping into carrier holidays, when networks run slower.
- Check the weather at the origin, the destination and the major hubs on the route.
- Set a daily cut-off for perishable orders, so they are packed and handed over the same day.
Labels and markings
- Required regulatory marks, such as the dry ice markings and Class 9 label for air shipments.
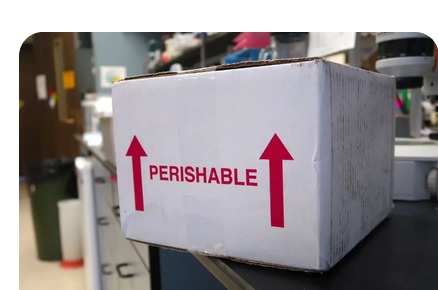
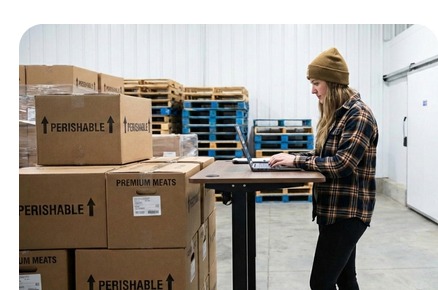
- 'Perishable' and orientation arrows, where the carrier supports them.
- Clear recipient instructions on the box, such as 'Keep refrigerated – open on arrival'.
- Labels printed from your shipping system, which should warn you before you create a shipment due to arrive on a weekend.
Monitoring: knowing what actually happened
Without data, you only learn that a pack-out failed when a customer complains. Temperature monitoring turns that into something you can measure and fix.
| Option | What you learn | Best for |
|---|---|---|
| Single-use data loggers | The full temperature history, read after delivery | Testing pack-outs and spot-checking shipments in transit |
| Reusable loggers | The same, at lower cost per reading if recovered | Regular testing on routes where loggers can be returned |
| Connected trackers | Temperature and location during transit | High-value shipments where you would act on a mid-route alert |
| Temperature indicators | Whether a threshold was crossed, without a full history | Low-cost reassurance for the recipient |
Testing and qualifying a pack-out
Never assume a pack-out works because it looks sensible. Test it.
- Pack a box exactly as you plan to ship it, with a temperature logger placed among the product, not against the coolant.
- Ship it along one of your longest real routes, to an address where someone records the delivery time.
- Repeat in your hottest and coldest expected conditions.
- Compare the logged temperatures against your target range, and look closely at the final hours, where failures usually appear.
- Adjust insulation or coolant and retest until the pack-out passes with margin.
- Document the final pack-out with photos, quantities and conditioning instructions.
For formal qualification, the International Safe Transit Association (ISTA) publishes thermal test standards, including ISTA 7D for thermal transport packaging and ISTA 7E for parcel delivery temperature profiles. Packaging suppliers and test labs can run these for you, which is worth considering for high-value or regulated products.
Food-safety rules beyond dry ice
Depending on your business and how your products move, other rules may apply. In the United States, for example, the FDA's Sanitary Transportation of Human and Animal Food rule sets requirements for shippers, loaders, carriers and receivers in certain motor and rail transport. It includes exemptions, such as for some smaller businesses, so check whether and how it applies to you. Products such as meat, poultry, seafood and alcohol can carry additional requirements, and shipping across borders adds import rules at the destination.
What it really costs
The true cost of a cold shipment is more than the label price. To compare options fairly, add up everything that goes into a delivered, sellable order.
- Packaging: liner, outer carton, coolant and fill.
- Shipping: the service level and the billed weight, which may be dimensional rather than actual weight.
- Surcharges: residential delivery, delivery area, fuel, Saturday delivery and handling for regulated contents.
- Labour: packing time, which grows with more complex pack-outs.
- Failures: refunds and reshipments for orders that arrive out of range, the cost most often left out.
The illustrative example below shows why the cheapest box is not always the cheapest order. The figures are made up to show the method; use your own numbers.
| Lean pack-out | Robust pack-out | |
|---|---|---|
| Packaging and coolant | $6.00 | $9.00 |
| Shipping | $24.00 | $26.00 |
| Labour | $2.00 | $2.50 |
| Failure rate | 8% | 1% |
| Failure cost (refund plus reship, $70 × failure rate) | $5.60 | $0.70 |
| Cost per delivered order | $37.60 | $38.20 |
In this example the two options cost almost the same per order, but the robust pack-out produces eight times fewer unhappy customers. Once you include lost repeat purchases and support time, it is clearly the better choice. Measure your own failure rate so you can make the same comparison with real data.
When something goes wrong
Some shipments will be delayed. What separates good operations is how quickly they notice and how well they respond.
- Watch tracking for exceptions such as missed connections, weather holds and failed delivery attempts.
- When a delay appears, estimate whether the pack-out will still hold. If it will not, decide early whether to reship.
- Contact the customer before they contact you, with a clear plan.
- If the carrier is at fault, file a claim with your packing records and photos.
- Log the cause, so repeat problems on a lane, service or day of the week become visible.
Helping the customer finish the job
Even a perfect pack-out depends on the customer getting the product into the refrigerator or freezer promptly. Send a shipping notice with the expected delivery date, a delivery notification, and clear instructions on the box and in the email. Tell customers how to dispose of dry ice safely: leave it to sublimate in a well-ventilated space, never in a sink, toilet or sealed container.
The complete pack-out checklist
- Confirm the product's temperature range and the design transit time.
- Choose the documented pack-out for the product group and current season.
- Condition the coolant, and the liner if required.
- Pre-chill or pre-freeze the product.
- Build the pack-out in the documented order, with barriers between coolant and sensitive products.
- Fill empty space, close the liner, and seal the carton without making dry ice shipments airtight.
- Apply all required markings, including dry ice details where relevant.
- Print the label, confirm the expected delivery day, and hand over before the carrier's cut-off.
- Record the tracking number against the order and watch for exceptions.
Frequently asked questions
How long does dry ice last in a shipping box?
It depends on the insulation, the amount of product and the outside temperature. A commonly cited rule of thumb is that a typical shipping cooler loses roughly 5 to 10 pounds of dry ice every 24 hours, but only a test shipment with a temperature logger tells you the answer for your exact pack-out.
Can I ship dry ice by ground?
Ground shipments generally carry fewer requirements than air, but carriers still have rules for dry ice, and some packages booked as ground travel by air for part of their journey. Check your carrier's current dry ice guidance for the specific service.
Should I use dry ice or gel packs?
Use dry ice to keep frozen products frozen. Use gel packs or phase change materials for chilled products that must stay cold without freezing. Dry ice will freeze chilled products it touches.
What temperature should refrigerated food stay at during shipping?
US food-safety guidance is to keep refrigerated food at 40°F (4°C) or below, and frozen food at 0°F (−18°C) or below. Your product may need a tighter range, so set your target from the product's own requirements.
What is the best day to ship perishables?
Early in the week, typically Monday to Wednesday, so a single delay does not leave the package sitting in a facility over the weekend. Avoid shipping into carrier holidays.
How do I know if my packaging is good enough?
Test it. Ship a box packed exactly as you plan to, with a temperature logger among the product, along a long real route in both hot and cold weather. For formal qualification, the ISTA 7D and 7E thermal test standards are widely used.
How should customers dispose of dry ice?
Leave it in a well-ventilated area to turn into gas on its own, out of reach of children and pets. Never put it in a sink, toilet or sealed container, and never handle it with bare hands.
Where Bellmont helps
Bellmont brings rates, delivery dates and tracking for every carrier into one place. You can see which service gets a package there inside your pack-out's safe window before you print the label, and spot a delayed shipment while there is still time to act.