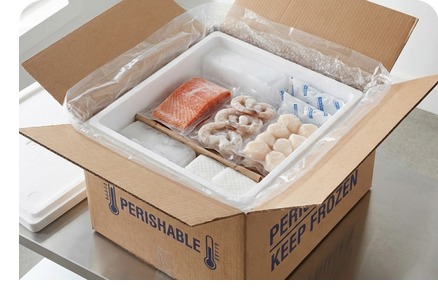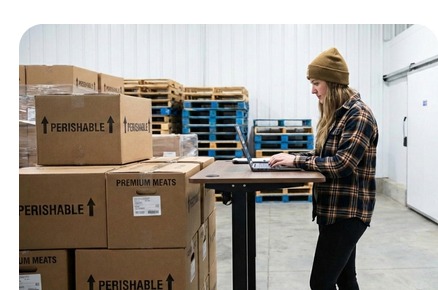
Dry ice is powerful, but it brings real costs: hazardous-materials marking and handling, restrictions on some services, extra training for your packing team, and the risk of freezing products that should only ever be cold. For a large share of food shipments, gel packs and good insulation do the job with far less complexity. This guide explains when you can drop dry ice, how to build a pack-out that holds temperature, and how to compare the costs honestly.
When you do not need dry ice
Dry ice is the right tool for keeping frozen products frozen. For products that only need to stay cold, it is often the wrong one. Consider gel packs when most of the following are true.
- The product needs to stay chilled, typically in refrigerator range, rather than frozen.
- Transit is short and predictable, usually one to two days.
- The product would be damaged by freezing, such as fresh produce, cheese, many sauces and baked goods.
- You want to avoid hazardous-materials requirements on shipments that may travel by air.
If a product must arrive frozen solid, such as ice cream, gel packs alone are usually not enough. This guide is about chilled shipping.
How gel packs keep food cold
A frozen gel pack absorbs heat as it slowly thaws, holding the space around it at a low, steady temperature. Because it thaws at a temperature much closer to refrigerator range than dry ice, it keeps chilled foods cold without freezing them, provided it is not in direct contact with sensitive items.
The amount of heat a pack can absorb is limited. Once it has thawed, it stops protecting the product. That is why insulation, which slows how fast heat arrives, is just as important as the coolant itself.
Insulation does most of the work
Many shippers try to solve a warm-arrival problem by adding more gel packs. It is usually more effective, and cheaper, to improve insulation.
- Thicker walls slow heat transfer. Even a modest increase in liner thickness can add hours of protection.
- A tight fit matters. A liner sized closely to the product leaves less warm air to absorb heat from the coolant.
- Fill empty space with crumpled paper or insulated fill so air cannot circulate.
- Close the liner fully. Gaps at the lid let warm air in quickly.
Recyclable insulation made from paper, cotton or plant fibre has improved greatly and suits many chilled shipments. Test it on your hottest and longest routes before relying on it.
Building a chilled pack-out
- Condition the gel packs by freezing them completely, for the full time the manufacturer recommends. Partly frozen packs run out early.
- Pre-chill the product, so the coolant is not spent cooling food that left the refrigerator warm.
- Place a layer of gel packs at the bottom of the liner.
- Add a thin barrier, such as corrugated card, so frozen packs do not freeze the product directly.
- Pack the product, filling empty space.
- Add another barrier and a layer of gel packs on top, because warm air rises and the top of the box usually warms first.
- Close the liner fully, then seal the outer carton.
Comparing the costs honestly
The price of coolant is a small part of the real cost of a chilled shipment. To compare gel packs with dry ice fairly, compare the total cost of a delivered, sellable order.
- Packaging: liner, outer carton, coolant and fill.
- Shipping: gel packs are heavier than an equivalent amount of dry ice for some pack-outs, which can raise the billed weight.
- Handling: removing dry ice removes hazardous-materials marking, training and any carrier restrictions.
- Labour: simpler pack-outs are faster to pack and less prone to mistakes.
- Spoilage: the cost of refunds and reshipments when an order arrives too warm or frozen.
For many chilled products, switching to gel packs lowers total cost even when the box is a little heavier, because handling and spoilage fall.
Adjust for the seasons
A pack-out that works in mild weather can fail in summer. Rather than reacting to complaints, plan two or three seasonal configurations and switch on a schedule.
- Cool season: lighter insulation or fewer gel packs, to save weight and cost.
- Warm season: more coolant, thicker insulation, or a faster service for long routes.
- Extreme heat: consider pausing shipments to the hottest regions, or shipping only early in the week.
Test before you switch
Never switch a perishable product to a new pack-out without testing it.
- Pack a test box exactly as you plan to ship it, with an inexpensive temperature logger among the product.
- Ship it along one of your longest real routes, ideally in warm weather.
- Record the arrival time and review the logged temperatures against your target range.
- Repeat in different seasons and adjust the insulation or coolant.
- Document the final pack-out with photos and quantities so every packer builds it the same way.
Tell customers what to do on arrival
Even a perfect pack-out depends on the customer putting the food away promptly. A delivery notification and a clear 'refrigerate on arrival' message on the box and in the email reduce the chance of a good shipment being spoiled on the doorstep.
Where Bellmont helps
Bellmont shows delivery dates for every service before you ship, so you can pick one that arrives inside your pack-out's safe window, and tracks every handoff so a delay is visible while there is still time to act.